Tuesday, February 01, 2011

Romantic Trail Desserts for Valentine's Day

Laurie Ann March is the author of A Fork in the Trail and the upcoming Another Fork in the Trail - a couple of dehydrator-friendly camping cookbooks if you're in search of more recipes for your outdoor adventures.

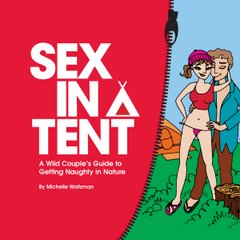
She recently wrote an article for Seattle Backpackers Magazine about romantic dining for campers, and included one of the recipes I wrote for Sex in a Tent, called Sex in a Pan.

Sex in a Pan

Serves 2 (or course, you could multiply it if you're into threesomes or whatever!)

There are many recipes for Sex in a Pan, but this one is perfectly suited to camping and so satisfying it truly deserves its name.

Ingredients:
8 chocolate chip cookies, crushed or broken into small pieces
2 oz Kahlua
1/2 package instant chocolate pudding
Water as required for instant pudding (see package directions)
12 marshmallows, toasted (but bring a few extra, in case some go “missing”)
1/2 cup chocolate chips

Instructions:
If you have a clean frying pan, you can make this in it, otherwise bring along a disposable pie plate or use a rectangular Tupperware container. Crumble the chocolate chip cookies and spread them in the bottom of the pan. Drizzle the Kahlua over the cookie bits, and mix together to moisten. Press the moist cookie crust into the bottom of the pan. Make the chocolate pudding according to the package directions, then pour it evenly over the cookie crust. Use the back of a spoon to spread it out if it doesn’t pour well. Toast the marshmallows and space them evenly over the top of the pudding. (If you can’t toast the marshmallows, they can be added as is or you can substitute marshmallow from a jar.) Sprinkle the chocolate chips over the top. Now grab your spoons and dig in!


I was happy to have it included, but it's bittersweet for me because here in New Zealand they don't seem to sell instant pudding mixes - so although I came up with this recipe I can't actually make it on any of my own camping trips!

Here's a link to the article.

Wednesday, January 05, 2011

Great Walk - The Heaphy Track

At the trail head

Christmas break seems to be the only time we get out for a longer than a weekend tramp these days. So this year we decided to tackle the longest of New Zealand's "Great Walks" - the Heaphy Track.

The track is 78.4 km long and can be walked in anything from 4-6 days. (I suppose you could do it in less, but only if you're going super-lightweight.) It's located in Kahurangi National Park, which occupies the north-west corner of the South Island. The track starts (or ends, as you can do it in either direction) around 30 km from Collingwood in Golden Bay, and ends close to Karamea on the West Coast.

We did a 5 day trip, mainly because that was the easiest way to arrange transportation to and from the trailhead. There is no way to do a car shuttle for the Heaphy, as the two ends of the trail are close to 500 km apart by road. So most trampers use some kind of commercial transport, and the most reasonable cost comes from taking a pre-scheduled service like we did. However, you can make arrangements for private transport if you have a specific schedule to keep - and if money is no object you can even get transported to the trail head by helicopter!

You can either stay in huts along the way, or camp at designated campsites (which are generally next to the huts.) We decided to camp as usually the huts are very busy over Christmas, and camping sounded a bit more peaceful. Unfortunately this meant that poor G was carrying our tent the whole way. All I had was the ground sheet. (I'm a bit spoiled!)

Two days before we started our tramp, there was a huge storm which hit the park - the worst in 150 years by some accounts. This caused major flooding and slips along the track, and washed away a couple of bridges. However, the water receded quickly and we were able to go ahead with our walk as planned.

The first day was where we encountered most of the new slips - around 10 of them. They were all crossable, but full of that thick, heavy mud that clings to your boots and makes that "schlorp" noise each time you take a step. It also made our boots super heavy as it clung to them in thick layers until we could find a stream to wash them off. This slowed our progress considerably, so instead of walking 5 hours on the first day (after a 4 hour drive to the trail head) we ended up walking almost 6.5 hours. Although the track was uphill all day, the grade is so gentle that you barely notice it. The track was originally explored as a possible road, so there is nothing tricky to negotiate - apart from the slips which I'm sure will be cleared up by DoC, after all this is a Great Walk.
One of the new slips

At the first hut (Perry Saddle Hut) we met the ranger, Mike. The rangers on the track have their own little huts they can stay in, and a certain range that they are supposed to look after. There were about half a dozen other campers, plus a full hut. Mike had found a brewing kit up at the rangers hut and had made a batch of beer up there, which he shared with the campers later that evening. While I'm not a beer drinker, it's certainly an unusual treat to get in the middle of the wilderness! The hut was located close to a river, where a few people decided to go have a wash. It must have been very cold, because we heard the kind of screams usually associated with horror movies!

View from the campground at Perry Saddle

We also saw our first weka (a native, flightless bird) of the trip that first night, and they would appear at pretty much every campsite along the way, looking for a bit of free grub. One of the huts even had a sign on the door saying "Please shut the door when you leave, and please ensure the weka is not shut inside!"

The wekas along the track are not shy!

The next day we moved out of the forest and onto the downs, which were mainly covered in red tussock.

Tufts of red tussock

We encountered a pole where trampers leave their old boots, and a few other interesting items of footwear. When we passed by there was a pink stiletto and an inline skate tied to the pole.

The boot pole

The next hut (Gouland Downs) was only a couple of hours down the track, and so we stopped for a short break there but carried on across the downs to Saxon Hut. This was a short day, just 3.5 hours of walking with no real hills to speak of. The track was well formed and graded the whole way. We had one slip to contend with at the beginning of the day, which was the only one we had to detour around rather than going across it.

Saxon Hut was in a lovely clearing, and the tent sites were on wooden platforms. They were nice and level, but hard and no matter how many tie-down spots they provide they never seem to be where you need them! Our spot was nice and sheltered on three sides though, which made for a pleasant night.

Tent platform

The following day took us to James Mackay Hut, just three more hours down the track. We crossed a flat section that apparently can be impassable after heavy rain, but the storm of several days before had drained completely and the track was surprisingly dry.

Some small rivers had swing bridges, but could also just be forded if the water was low. We chose to use the bridges, because the novelty of having dry feet on a tramp in New Zealand was too much to pass up! The rivers were quite calm though, and could easily have been crossed. Most were dark with tannins, giving them a dramatic look.

A tannin stained river

Mini swingbridge over a stream

We reached James Mackay Hut and found a tent platform slightly apart from the other ones for added privacy. However, it turned out to be the windiest spot and we had a bit of a challenge putting the tent up. We had the spot to ourselves until about 7pm, when a mother and daughter showed up and pitched beside us. They would have been nice, quiet neighbours except that the mother snored like a lumberjack all night! Not that it mattered, since it was New Year's Eve and several of the other campers were up celebrating noisily into the night. Thankfully we had ear plugs, as we didn't feel like partying with our longest day coming up.

Our fourth day we had to cover 20.5 km of track, around half of which was the descent back to sea level. However, the descent was as gentle as our climb on day 1 - so we hardly noticed it. Once we left the tops behind, the forest thickened and began to look more typical of the West Coast with mossy tree trunks, large ferns and tree ferns. We made our way down to Lewis Hut, which sits above the Lewis River. Apparently the hut had flooded quite badly the night of the storm, despite being around 5 metres above the normal level of the river! There were tons of sandflies around the hut, so after a quick toilet stop (I forgot to mention earlier that all of the toilets along the track are stocked with toilet paper - luxury!) we decided to continue on for a while and find a lunch spot on the track.

Emerging from the forest at the coast

The track followed the Heaphy River all of the way out to the coast, through lush forest full of ferns and Nikau palms - New Zealand's native palm tree.

Nikau palm trees

It was easy and pleasant walking, but still a long day. Heaphy Hut is place within view of the river mouth, as it meets the Tasman Sea. It's a very picturesque spot, with crashing waves and dramatic cliffs.

The dramatic rivermouth

The hut has a very manicured lawn, and a fairly large camping area off to one side. The camping area even has its own shelter, so you can cook under cover if it rains without using the hut facilities. The drawback of the location is an abundance of sandflies. The minute you stood still they would swarm around looking for a nice bit of exposed skin to bite. They had been present all along the track at each campsite, but here they were much more intense.

Heaphy Hut with its manicured lawn

Once we got our tent up, we went for a walk to escape the flies. We went down to the riverside, where a few people were going in to get a bit clean (I wouldn't go so far as to call it swimming - it was too cold for that) and we rounded the corner to the seashore and walked along the beach for a bit. It was out of the way of the flies, but the tide was coming in, and we didn't want to get cornered and have to scramble our way back to the campsite. So it was back to the bugs, and try to make dinner without becoming dinner!

We went back down to the beach later, but the wind must have dropped because the flies were now down there too. So there was nothing to do but escape into the tent and play cards for a while before turning in.

We got a pretty early start on our final day, not wanting to be late for our 1:30pm pick up. There is one spot along the coastal portion of the track which can be impassable when the tide is in and the seas are rough, and we were set to reach it right around high tide. The last leg of the track follows the coast straight south, mainly staying just off the beach at the edge of the forest. There are nikau palms everywhere! Even when you're not on the beach, much of the track is sandy and soft, which is a bit annoying to walk on.

There was a shelter and camping area around half way down, which was the least pleasant place I could imagine for camping. The ground was all uneven and covered in scrubby tall grasses, the sandflies were terrible and the outhouse was really close to where you would camp. Definitely for emergencies only!

We reached the spot where the track crosses the beach, and although we were right at high tide there was plenty of room as the seas were calm. We got there faster than expected, and slowed our pace so we wouldn't get to the trail head too early and have to wait around swatting flies for hours.

Crossing a small stream along the coast

Even taking our time, we were ahead of schedule and looked for some little rest stops where the flies weren't bad. Was another campground (much nicer than the earlier one) with picnic tables and fireplaces but still too many bugs to stay for long.

You cross a small saddle just before the end of the track, and on the top there is a little lookout area, which was thankfully bug free. We hung out there for a while chatting with other hikers, most of whom were on day walks. We also chatted with a German girl who was taking the same transportation as us, and also trying not to arrive too early.

When we reached the end, the bus was there early anyway so we needn't have worried.

The Heaphy Track (without the slips) is a very straightforward walk, and would be a good track for someone with limited experience or skills on more difficult terrain. It is long though, so you do need to be capable of walking up to 20 km in a day, carrying your gear and food. (On a six day version, the longest walk would be 17.5 km.) Both huts and campsites need to be booked in advance, and as this is a Great Walk the fees are higher than normal. Camping costs $12 per person per night. Huts cost something like $32 per person per night.

This winter, the track is scheduled to open to mountain bikers for the first time. This is a trial, with the track open for cycling in the winter season, and tramping in the summer. DoC will then assess whether the bikes are doing too much damage to the track. I'm sure it will have a noticeable effect on the surfaces, especially since the track is likely to be muddy over the winter, so bikes will create deep ruts. But we'll have to wait and see what happens with that.

Saturday, December 18, 2010

A Practical Corporate Gift? Wow!


I don't get a lot of corporate Christmas gifts at my day job, but I've seen enough of them to know that the best ones are usually edible/drinkable gifts, and the rest tend to be crappy knicknacks that you either throw away or leave on a shelf for a few years and then...throw away.

However, one of the two gifts I got this year was so practical I just had to share (even though it's slightly off topic for this blog, but not entirely.) Our printing company gave me this wind-up radio and flashlight!


Now as you may know, Wellington is situated on a few fault lines (as is most of New Zealand) and we really do need to be prepared for an earthquake at any time. So a flashligh and radio that will work when the power is out is a great idea. Not only that, but it comes with an adaptor cord so that you can use it to power other electronic devices too!

It's going straight into our emergency kit, along with a larger flashlight, extra batteries, non-perishable food (at least 3 days' worth) and our first aid kit. We also have two large (20 litre I think) jugs full of drinking water. Many people keep candles and matches in their emergency kit, which is fine unless the emergency is an earthquake. Aftershocks mean that candles can easily get knocked over and start a fire, so avoid open flames after an earthquake.

What we're missing, and just out of laziness of getting this together, is a "grab bag" in case we have to leave the house quickly. This should have warm and waterproof clothing, comfy shoes for walking, a few changes of underwear, hand sanitiser, flashlights, sleeping bags, and probably our tent.

With the major earthquake Christchurch experienced a few months ago, disaster supplies have made a bit of a comeback in New Zealand. But anyone, anywhere can lose electricity and water for a few days - so really all households should have supplies on hand.

US College blog Zen College life recently did their own version of what should be in an emergency kit - so you can read their list here.

Saturday, December 04, 2010

Mal Does it Again!


I'm pleased to report that totally insane trail runner Malcolm Law has just completed his second "7 in 7" series of runs, raising money for the Blood & Leukaemia Foundation.

Last year Mal ran 7 of New Zealand's "Great Walks" in 7 consecutive days. This year he did 7 more marathon runs on amazing South Island tracks - this time a little closer together so he could focus more on running and fundraising and less on getting from one track to the next.

This year's tracks in the run series were:
1. Twin Lakes Marathon
2. Young-Wilkin Circuit
3. Motatapu Gold
4. Wakatipu Wonderland
5. Rees-Dart Circuit
6. Greenstone-Mavora Walkway
7. Kepler Challenge

If you're not familiar with these routes (and therefore tired just looking at that list) bear in mind that most of these were longer than a marathon, with the Rees-Dart clocking in at a whopping 67km! Only the Kepler Challenge finale was a repeat from last year.

I'm somewhat embarrassed to admit that I haven't walked ANY of these tracks. Actually, I have done the Greenstone in combination with the Routeburn Track, so that counts for half or something.

While the runs have been a great success, Mal is still $6,000 shy of his ambitious $150,000 fundraising goal. If you want to help out, you can donate on his website.

Just before the runs began this year, Mal held an auction in Wanaka hosted by Kiwi sports celebrity Marc Ellis. The auction raised over $10,000, and I'm happy to say that I played some small (very small I imagine) part in that by donating a copy of Sex in a Tent. Here's a pic of Mal and Marc auctioning it off!


I guess Mal is having a good rest right about now. Congrats and well done!

Sunday, October 24, 2010

Getting Your Feet Wet

Soaked to the knees

One of my least favourite things about backpacking is hiking with soaking wet feet. In New Zealand, this is pretty much unavoidable. There are so many unbridged stream crossings that you'd have to pick your tracks very carefully to avoid wetting your boots. And I'm not talking about splashing through to test their "waterproof" qualities. I'm talking about the water gushing in over the top so there's full saturation!

Last weekend we went on our first overnighter in a while and yes, we crossed a stream that was just about up to my knees. Not deep enough to be a scary river crossing, but deep enough to get my boots thoroughly soaked for the weekend. There were also lots of muddy sections in the track, and a bit of bad judgement on one of them had me up to mid-calf in mud and wondering if I'd be able to pull my foot back out - and if I'd still be wearing my boot when I did. However, I digress.

Wet feet are a mere inconvenience most of the time, but on a long trip they can be a real problem if you don't deal with them properly. As we all remember from history class when we talked about WWI (you were paying attention, right?) "trench foot" can be quite crippling. It takes surprising little time with wet feet before the skin simply starts to fall apart. It's disgusting, painful, and sure makes hiking more difficult!

It's also easily avoided, by simply making sure your feet get dry for long enough to let the skin recover. To make sure this is possible, I always bring one pair of walking socks (which will probably get wet) and one pair of evening socks which I keep dry. As much as I hate putting those cold, wet socks back on in the morning, I know that I can't risk wearing my dry ones and letting them get wet too. Being left with no dry socks is not a good option.

Usually I also bring along a very stylish pair of fake crocs to wear in the evening. (I know, I know, but they're so light to carry!!) So my dry socks go into dry shoes at camp. If you don't carry a second pair of footwear and your boots are soaked, you can keep your dry socks dry by sticking your feet (with your dry socks on) into plastic bags before you put your wet boots back on. It's an even more fashionable look than my crocs!

I also try to head off foot damage before it happens by putting first aid tape over the parts of my foot (back of my heel, and a couple of my toes) where I most often get rubbing/blisters. I now change the tape daily after giving myself a nasty rash on one trip by leaving the same tape on for 3 or 4 days. It turns out my skin doesn't like that very much. It itched for weeks!

Getting your boots dry between trips can also be a challenge. Putting them too close to heaters can cause damage. Leaving them out in the sun is good, if you happen to get the right weather for it. One thing we do which seems to really help is to stuff old newspaper inside the boots. It absorbs the water out of the boots much faster than just leaving them. Swapping the old, saturated newspaper for fresh paper once or twice a day speeds up the process.

Also, most boots have removable insoles. Taking these out and leaving them to dry separately will allow more air to get to the bottom of your wet boots.

I'd love to hear your tips on dealing with wet feet and boots - so if you've got some ideas to share please post them as comments!

Saturday, October 02, 2010

Review: Katadyn Pro Hiker Filter


I must admit to becoming a bit spoiled as a tramper in New Zealand. Like many other Kiwis, I tend to rely on rainwater collection tanks at the backcountry huts for my supply of clean drinking and cooking water. Most huts have these tanks, and since the NZ backcountry is rarely hit with drought conditions, the tanks are not often empty.

However, when tenting away from the beaten track, or on the rare occasion when rainwater is not available, trampers here do need a backup method of getting their water supply. In the past, we have used either boiling (the most reliable method, but you use a lot of extra fuel) or purification tablets.

Last weekend, I was able to test drive a Katadyn Hiker Pro water filter, something I haven't used since I relocated to NZ. I got a review one from allfilters.com, who sell all kinds of water filtering equipment for both home and away. They only stock Katadyn filters, and I wanted to give the Hiker Pro a try because a) it's under $100 which makes it reasonable for most backcountry campers to add to their gear collections, and b) it's reasonably small and lightweight (11 oz.) so it's not a burden to bring along on a trip. It also claims to get up to 750 litre (200 gallons) through the filter before it needs replacing, which seems like good value.

What makes this mode the 'pro' version is that it has extra attachments to connect the filter to either a widemouth Nalgene bottle or a hydration bladder. Being a bladder-user myself, I thought this was a good feature. Unfortunately it doesn't connect to ALL bladders, just certain brands that have a quick connect fitting built in. So no easy connection for me. Even my Nalgene is a narrow mouth!

The initial set up was relatively straightforward and the instructions easy to follow. I pre-cleaned the filter as instructed by pumping about a litre of water through it before we left home. This cleaned the dust out of the filter (which was clearly necessary!)


I took the Hiker Pro out to one of our favourite spots in the Catchpool Valley on a lovely spring day. I stopped next to a running stream and gave it a go.

It was easy to pump, and quickly filled my bottle. Their fill rate of 1 quart (1 litre) per minute seems accurate. The water tasted great, and 24 hours later my tummy is just fine so it must have worked!

There is a good pre-filter at the end of the intake hose which keeps the filter from getting gunked up with leaves and other large particles.

They also supply you with a separate carrying baggie for the output hose, to keep it from getting cross-contamination when carried with the rest of the filter. Everything fits in a small, nylon pouch which packs well.


The Hiker Pro has a 0.3 micron filter. This is small enough to remove bacteria and protozoan cysts like Giardia. It will not filter out viruses, so if your water supply is likely to have viral contamination you should still boil it as a precaution.

This is not the smallest or lightest water purification you can buy, but unlike a Steripen you don't need to rely on batteries, unlike purification tablets it doesn't make the water taste strange, and unlike boiling you don't need fuel or fire. If I'm going somewhere with a questionable water supply, I will definitely be bringing it along.

Friday, September 10, 2010

Food to Go - a backpacking cookbook


Frank and Sue Wall, who run the popular Australian blog Our Hiking Blog recently released an e-book about eating well on the trails, co-authored by Sue Hadskis.

"Food to Go" is a bit different from other backpacking cookbooks. What I found unique about it is that it caters to a wide variety of ways to eat on a multi-day trip, rather than focusing on making dehydrated meals from scratch. It does cover recipes for such meals, but let's face it, there are a lot of backpackers who never cook from scratch when they're eating at home, and aren't about to start just because they're going on a trip!

There is a section comparing various pre-packaged freeze dried meals. These are growing in popularity, and it's nice to have some first-hand accounts regarding portion size, flavour and texture. While I wouldn't use these meals while hiking locally, I can see it being a good option if you are far from home and don't have access to a kitchen.

They also discuss dehydrating techniques at length, including examples of how to dehydrate a take-out meal for your trip. Brilliant! Even if you have no idea how to make a curry, you can buy one from your favourite restaurant, dehydrate it, and eat it at camp. Ditto your favourite stir fry or pad thai.

If you're willing to do a bit more work, there are also recipes which include the use of pre-packaged sauce mixes and other convenient ingredients. And of course for the purist there are recipes from scratch for both omnivores and vegetarians.

The book also includes sample four day menus from a variety of outdoors enthusiasts, myself included. It's quite interesting to see what different people like to eat on their trips. I know that when I'm at tramping huts in New Zealand, I'm always fascinated to see what other people are having for dinner. I think my biggest surprise was when some friends started cooking up garlic shrimp! (Granted, it was a one night trip.)

Food to Go costs $19.50 Australian - which is around US$17.50. You can download the pdf HERE.

Frank and Sue also have an e-book about hiking Tasmania's famous Overland Track - so if you're heading down under you may want to check that one out too.

Tuesday, August 31, 2010

Guest Post: Lingerie in a Tent

Photo: Jockey Underwear

Sorry for the long absence! Today I'm happy to say we have a special guest post from Maggie Ewles, who runs an informational website about swimwear and lingerie - two great things to take camping! You can visit her site at: www.swimwearandlingerie.com. Her post reinforces a lot of the advice in "Sex in a Tent", so it's nice to see more of us outdoorsy girls thinking along the same lines!

When hitting the great outdoors with your loved one for a little rest and relaxation, the authentic outdoors person will have a tried and true list of camping essentials. Topping the list will be all the survival basics such as a tent, hiking gear, cooking paraphernalia, knife, flashlights and bug spray. However, what if you were planning on surprising your partner with a little loving in the evenings? Nature lovers will shout out that true backwoods types don’t need props or foolish luxuries to get jiggy in the tent. However, I have found that a few tiny, pre-planned items included in your backpack can pack a heck of a wallop!

First things first…. We all know that bathing in the great outdoors isn’t always a sure thing. We also know that canoodling tends to involve the parts of our bodies that begin to smell rank right off the bat. You may be swimming every day, but quite frankly the things you have planned require a little more attention than a splash around four hours ago can provide. What’s a girl to do? Voila, to the rescue: baby wipes! Seriously, these little wonders offer more cleaning power and durability than your standard wet wipe napkin and they not only clean and freshen, your nether-belows, they also make pretty good kindling once they have dried out. Multifunctional and nice smelling things definitely deserve a little room in the pack, just be sure to pack them in a reseal-able bag or container.

How about your undies? Are you wearing the standard non-cotton (so they will dry overnight and not stay full of congealed sweat for the whole trip) underwear? Camping undies have come a long way in recent years. Backpackers can choose from a ridiculous amount of colors, patterns and styles and even find some that will double as swimwear which leaves more room in the bag for…yup a little lingerie.

We all love the look and feel of silk but let’s face it, silk really doesn’t pack or travel well. You want your fellow hiker staring in stunned awe at your curves and not your crinkly wrinkly whatever-that-thing-is hanging off your shoulders. So maybe now is the time to break out a little mesh slip or teddy that is completely inappropriate for the great outdoors. Seriously, the surprise factor here and the idea that you have planned this will be more than enough fuel to get your buddy fired up.

Next up, we have some important considerations for your body. If you are the type to shave/wax/depilate, consider changing the design of your bikini area. Like a gift being unwrapped, each layer provides a new surprise and thrill. If you are not the de-furring type, pat yourself on the back for not having to waste a good chunk of your life worrying about this crap.

Along with keeping your body clean and potentially less hairy, having visible chafe marks or grooves left from your standard daily underwear is pretty high on the not sexy list. Nothing like a massive welt running up each side of your hip to scream out; “I was wearing ill-fitting granny pants that reached up to my rib cage the whole day.” A likely mood killer, so, why not shop with an educated eye for a good fit and long term comfort when you are grabbing your camping gear?

Now is not the time to be overly eco-concerned. Bamboo and cotton are replenish-able resources, however, in a high humidity and sweat inducing environment, these are not the best choices. You could either bring a pair of cotton undies for each day of your trek with a few extras for those just-in-case scenarios, or you could bring two pairs of nylon/spandex or wool underwear and simply give them a good wash each evening and allow them to dry overnight, poof, so much more room in your pack for all of the little extras right? But don’t just grab the first pair of nylon briefs you see. Take a look at your body and decide what style is the most flattering; brief, bikini, thong or boyshort? Thank goodness the Tilley high-waist travel panties aren’t the only option any more. Once you have the style down, make sure they have no-chafe flat seams, are wedgie proof through all motions and are truly moisture wicking. If you are feeling fancy, by all means invest in some of the cooler high-tech options such as the inclusion of silver ions in the fibers for their anti bacterial/microbial action, sun blocking fabrics or the new no seam styles.

Now that we have your day to day stuff worked out and guaranteed not to leave unsightly wear and tear marks on your body, let’s talk about lingerie. A matching set definitely has a wow factor, but only if there is light in the tent. In which case, you will also be putting on quite the puppet show for all the forest animals and any intrusive camping neighbors. How about texture? Will you bring along something that is satiny smooth or heavily embroidered? Little ribbons and bows are really cute…until they get caught on the zipper of your sleeping bag and you end up needing to be cut free from the metal teeth. The lesson here is don’t bring something you don’t mind losing or destroying. Think of the shock and awe philosophy; after all you aren’t looking to get some real wear and tear out of it, just stimulate some interesting conversation.

We can move on to the third consideration; scarves. Lovely, long, silk or organza scarves can be used in so many different ways. Like… to hang up your every-day undies while they dry, restrain and immobilize an over extended… ankle that you sprained while distractedly daydreaming during your hike or even to tie up… a pulsating wound in a tourniquet when someone overestimates their lumberjack abilities. See? Scarves can be justified for a multitude of uses while also being exceptionally light and easy to pack and quite frankly an excellent source of entertainment, limited only by your imagination.

Whatever you decide to pack in your bag, just remember that confidence is truly the most titillating part of any lingerie set. Now stand tall and show off those sequins, just remember that Park Rangers seldom have a sense of humor so don’t try to pull any streaking Yeti jokes.

Maggie Ewles is the type of person will forgo that extra emergency food ration in order to pack a sexy little camisole set. She is an avid hiker and believes that women have sacrificed comfort for style for far too long. There is no good reason that stylish swimwear can’t look good and be wearable at the same time.

Saturday, June 26, 2010

Knives for Camping - What's Best

Imagine that you're dropped naked on a deserted island and you can only have one piece of equipment. What do you choose? Sleeping bag? Lighter? Compass? If you really had to fend for yourself, you probably would need a knife above all else. With a knife comes the possibility of food and shelter - and perhaps some makeshift clothes too!

We've all been told that a knife is one of those "essentials" we need to take on any hiking or camping trip. Most of the time they get used for slicing dinner ingredients, or maybe cutting off a length of cord for a laundry line - but when things go wrong you may need your knife to help you build a shelter, hunt, or fix your gear.

There are a ridiculous number of options out there when it comes to buying a knife. And today's post comes to you thanks to my partner G, who has spent a lot of time learning about knives and which ones are best for which tasks. He took me through the main types of knives you may take camping or hiking with you, and their pros and cons. If you have a favourite knife to bring along, leave a comment and let me know what it is and why it's the best!

Fixed blade

A fixed blade knife is not often the first choice for campers. The fact that it doesn't fold up means that you'll need a sheath or other carrying case - and that means extra weight. But a fixed blade is inherently stronger because there is one piece of metal that continues from the blade straight through the handle (inside the comfort grip) called the "tang". You may not always need that kind of strength - but if you found yourself actually depending on a knife for survival, you'd want one that wasn't likely to snap in half!

The knife pictured on top has a certain "Rambo" appeal with the serrated top and upturned "clipped point" blade. However, it is heavy and the thin tip is likely to break off under pressure. The bottom knife blade has a much stronger and more practical shape for general use, with a "dropped point".

Gimmicks like hollow blades to make the knife lighter also make it weaker, so if you don't want to carry anything heavy, you'll be sacrificing dependability in exchange for weight.

Single folding blade
A knife which folds is more convenient for hitting the trails since it will fit in a pocket and be lighter. The weak point of the folding knife is obviously the hinge. However, a single folding blade like the ones in the photo often come with a locking mechanism to prevent the blade from folding shut while in use. This is a handy feature that often isn't found on inexpensive camping knives.

The blades on the knives pictured are substantially bigger than you would find on a standard Swiss Army or Leatherman type of tool. This makes them more useful for big jobs like cutting branches, gutting fish, skinning an animal, etc. Again, these might not be tasks you need to do on an average camping trip, but if you were lost or hurt, it could be the difference between being able to put together a makeshift leg splint or not.

Multitool
The multitool (Leatherman is the best known brand) has many uses. Most models come with an array of blades, screwdrivers, pliers, wire cutters etc. for fixing a wide variety of items. However, they are usually not designed with camping in mind. The knife blades tend to be small and narrow, which means that they are not suited to tough jobs. Many of the other tools (screwdrivers come to mind) are unlikely to be needed on a camping or hiking trip.

Where multitools are really handy is a trip with lots of equipment that may need repair. So if you are on a long cycling trek, mountaineering, or on any big expedition, I expect you will want one of these on hand to fix mechanical faults. For general camping, I don't see them being worth their weight, which is significant.

"Swiss Army" knife
For me, the Swiss Army style of knife has always been a part of camping. The array of models available these days is a bit overwhelming. You can get everything from a magnifying glass to a USB drive on your knife. But the more toys attached to a knife, the heavier it gets.

For my money, the best tools to have on a camping knife of this type are a good blade (all come with 1-2 small blades), a saw for cutting small branches (the knife blades are too small for this) and an awl for punching holes and making small repairs to packs or other gear.

Of course, the can opener can be useful if you cook from cans, and the corkscrew seems to be unavoidable for some reason! The tweezers can also come in handy, although they are not the most effective tweezers around. Usually they'll do in a pinch when a sliver of wood is making life miserable.

Swiss Army knives are probably not great survival tools with their small, easily dulled blades. But their small size, light weight and low price will probably keep them at the top of the popularity charts for most campers and hikers. And as long as nothing goes too badly wrong - they'll certainly do the trick.

Of course a knife is only as good as it is sharp, so in a future post I'll talk about how to sharpen a knife.

Thursday, June 03, 2010

Mal's at it again! And you can help

This is what happens when the power of alcohol is used for good, not evil!

Last year I blogged about trail runner Mal Law's "7 in 7 Challenge" where he ran 7 of New Zealand's Great Walks in 7 days to raise money for Leukaemia.

Now he's decided to make this a going concern, and plans to run another 350 km on the trails in just 7 days this year. His new goal for fundraising - a total of $250,000.

But here's how you can help without even reaching into your pockets. New Zealand beer brand "Steinlager Pure" is giving away $100,000 in funding to the best idea for a "pure future". Mal has added his 7 in 7 Challenge to the ideas competing for the funding, and he's in the lead!

You can vote for Mal's idea to help him secure the money to make his second challenge week happen without grovelling at the feet of corporate sponsors. Just follow this link http://www.purefutures.co.nz/Find-a-Pure-Future.aspx and cast your vote for Malcolm Law.

Voting continues throughout this year, so make sure you spread the word.